
 Bookmark
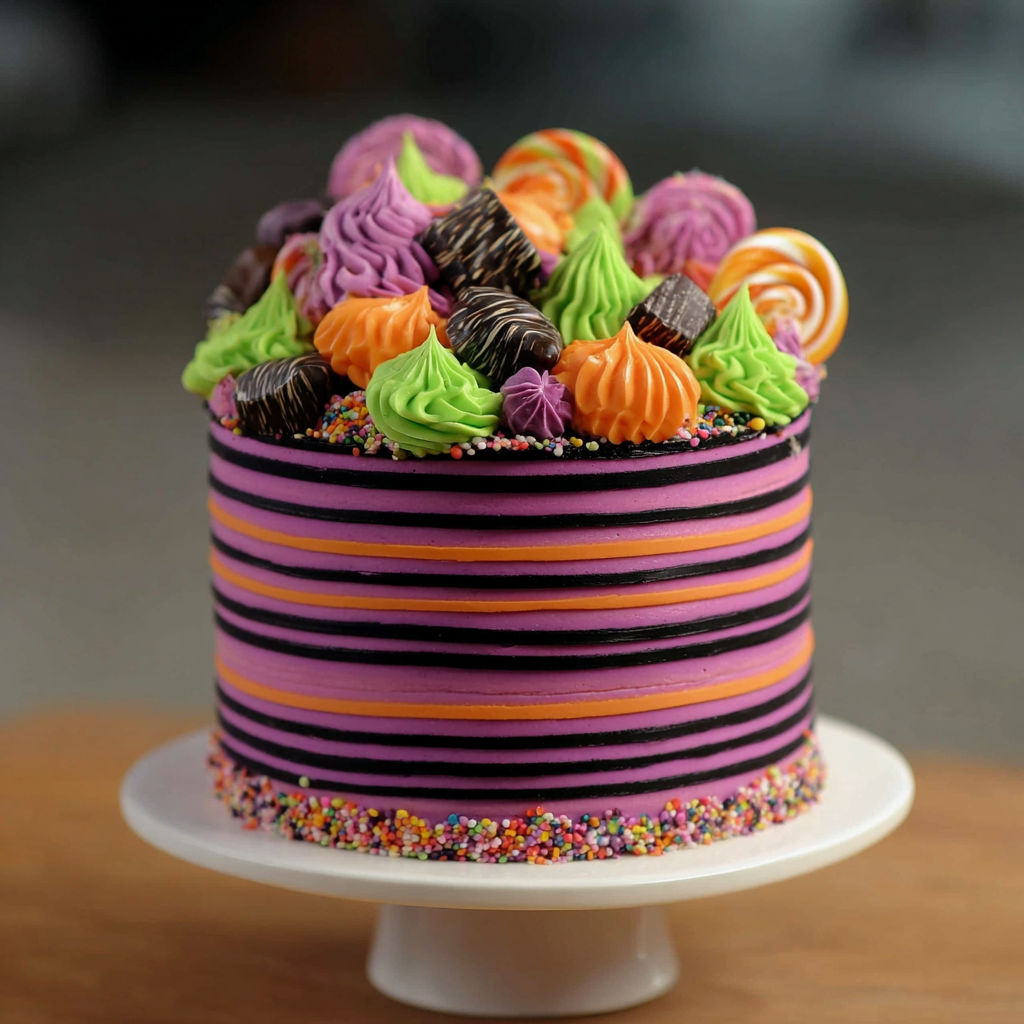
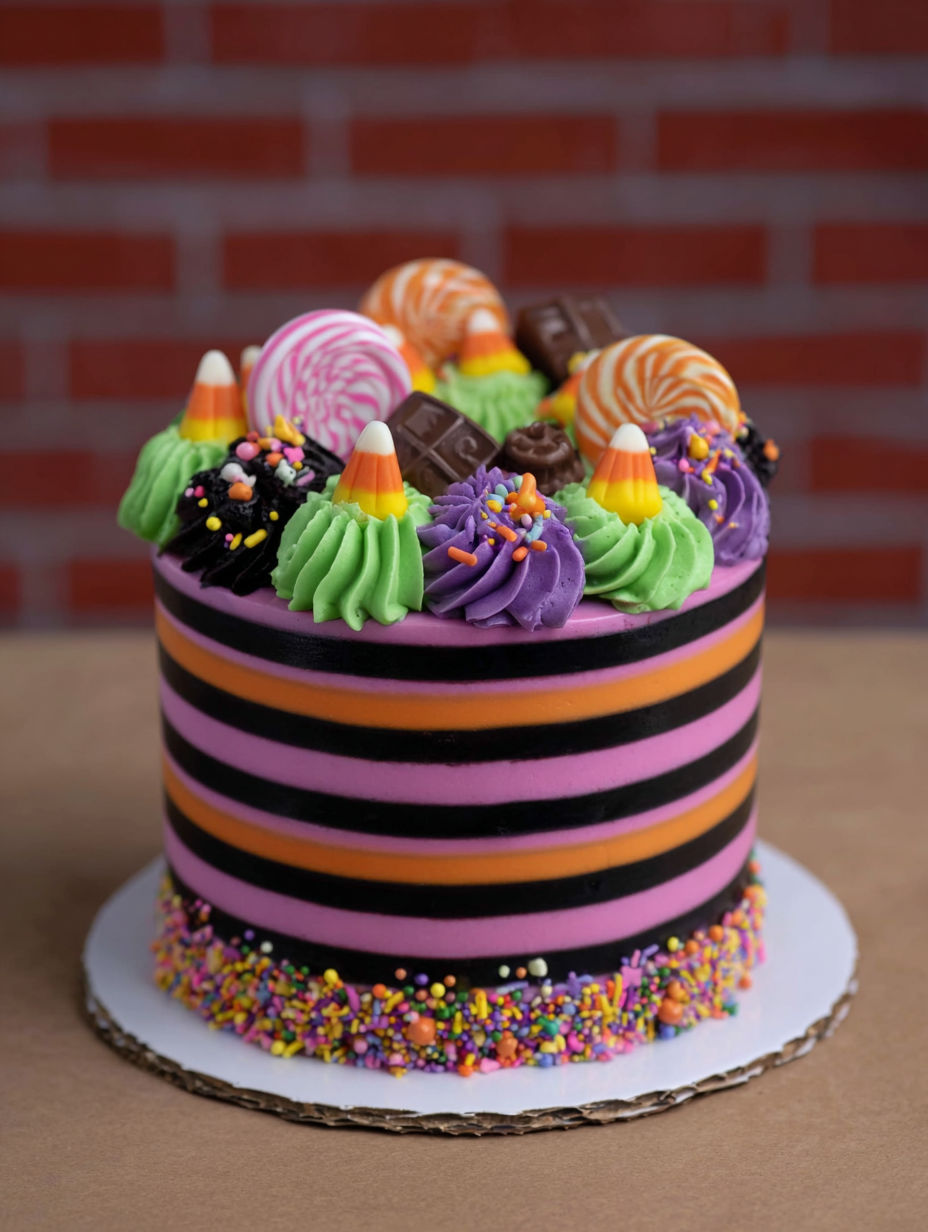
This striped Halloween candy cake brings an impressive yet approachable design to your festive celebrations. With precisely layered colorful buttercreams and a smooth black base, this cake looks professional while remaining simple enough for home bakers to master. It’s perfect to wow guests with vibrant stripes that frame a spooky candy crown.
I first assembled this cake during a lively Halloween party with friends, and it quickly became the centerpiece everyone asked about. The bright colors and playful candy toppings always bring smiles.
Ingredients
- One 6 or 8 inch round cake: choose a sturdy cake like a butter or pound cake so it holds the buttercream layers well
- Black buttercream: provides a bold base that makes the colorful stripes pop, use high quality cocoa powder for richness
- Green buttercream: vibrant and smooth, prepared in a piping bag for controlled application
- Purple buttercream: adds rich color contrast, use gel coloring for vividness without thinning the frosting
- Orange buttercream: classic Halloween shade that brightens the presentation, ensure it is well whipped for easy piping
- Halloween candy: select a mix of shapes and textures for an eye catching topping
- Sprinkles: add extra festive sparkle and texture
Instructions
- Smoothing the Base:
- Begin by icing your pre baked and cooled round cake evenly with black buttercream. Use an offset spatula and a turntable stand to achieve a flawless smooth finish. This layer is crucial because it sets the dark backdrop for your stripes. Chill the cake briefly if necessary to firm the buttercream.
- Preparing the Buttercream Stripes:
- Fill three separate piping bags with green, purple, and orange buttercream. For uniform stripes, use a star piping tip and gently apply strips vertically around the cake from top edge to bottom, spacing them evenly. Practice steady pressure to create consistent lines.
- Refining the Stripes:
- Once piped, use a cake comb on the cake’s side to smooth and blend the stripes gently without merging the colors too much. This helps create clean, professional looking color separations. Repeat the process if smoothing causes the stripes to flatten.
- Decorating the Top:
- Crown the cake with an assortment of Halloween candies and sprinkles. Choose candies with various shapes, colors, and sizes for a festive and textured finish. Settle the decorations carefully to avoid displacing the icing stripes.
- Chilling and Serving:
- Refrigerate the finished cake for at least 30 minutes to allow all icing to set firmly before slicing. This will help keep the stripes intact when serving.
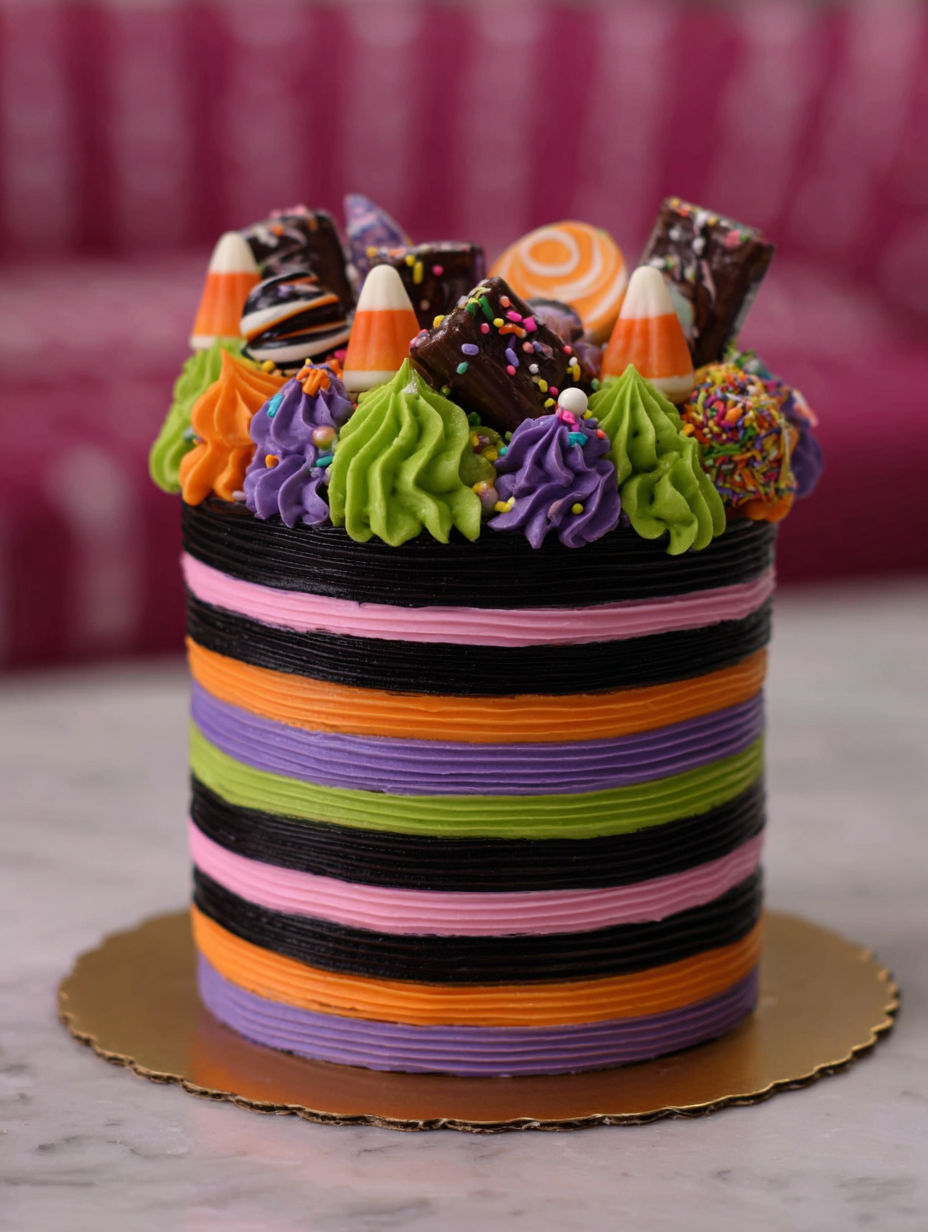
My favorite part about this cake is the vibrant stripe pattern. It always reminds me of a Halloween we spent decorating with friends where everyone brought their favorite candies to add. The colorful combination and shared creativity made it a truly memorable night.
Storage Tips
To keep the buttercream fresh and the colors bright, store the cake in an airtight cake container at cool room temperature or in the refrigerator if your kitchen is warm. Before serving, let the cake come to room temperature for the best flavor and texture experience. This cake holds well for 3 to 4 days.
Ingredient Substitutions
If you cannot find gel food coloring for vibrant hues, use natural alternatives like spinach powder for green or beet juice for purple, though expect milder shades. For the black buttercream, a mixture of cocoa powder and activated charcoal powder creates a deep rich black.
Serving Suggestions
This cake pairs wonderfully with a lightly spiced hot chocolate or a sparkling autumn cider. It also works as a dramatic dessert centerpiece for Halloween potlucks or themed parties where individual slices can be garnished with additional candies or edible glitter.
This striped Halloween candy cake is a showstopper that is achievable for home bakers. Chill before slicing to keep the stripes intact.
Common Recipe Questions
- → Quel type de gâteau utiliser pour ce décor ?
Un gâteau rond de 15 à 20 cm de diamètre avec une surface bien lisse facilite l’application des glaçages colorés.
- → Comment obtenir des rayures nettes en glaçage ?
Utilisez plusieurs poches à douille remplies de beurre sucré aux couleurs différentes, appliquées en bandes parallèles.
- → Puis-je préparer le gâteau à l’avance ?
Oui, commencer avec un gâteau glacé lisse acheté ou préparé à l’avance permet de gagner du temps lors de la décoration.
- → Quels outils sont nécessaires pour la décoration ?
Une spatule décalée, un peigne à gâteau, un plateau tournant et des poches à douille munies d’embouts étoile facilitent le travail.
- → Comment réussir une parfaite finition Halloween ?
Ajoutez des bonbons thématiques et des paillettes comestibles sur le glaçage pour une touche festive et spectaculaire.