
 Bookmark
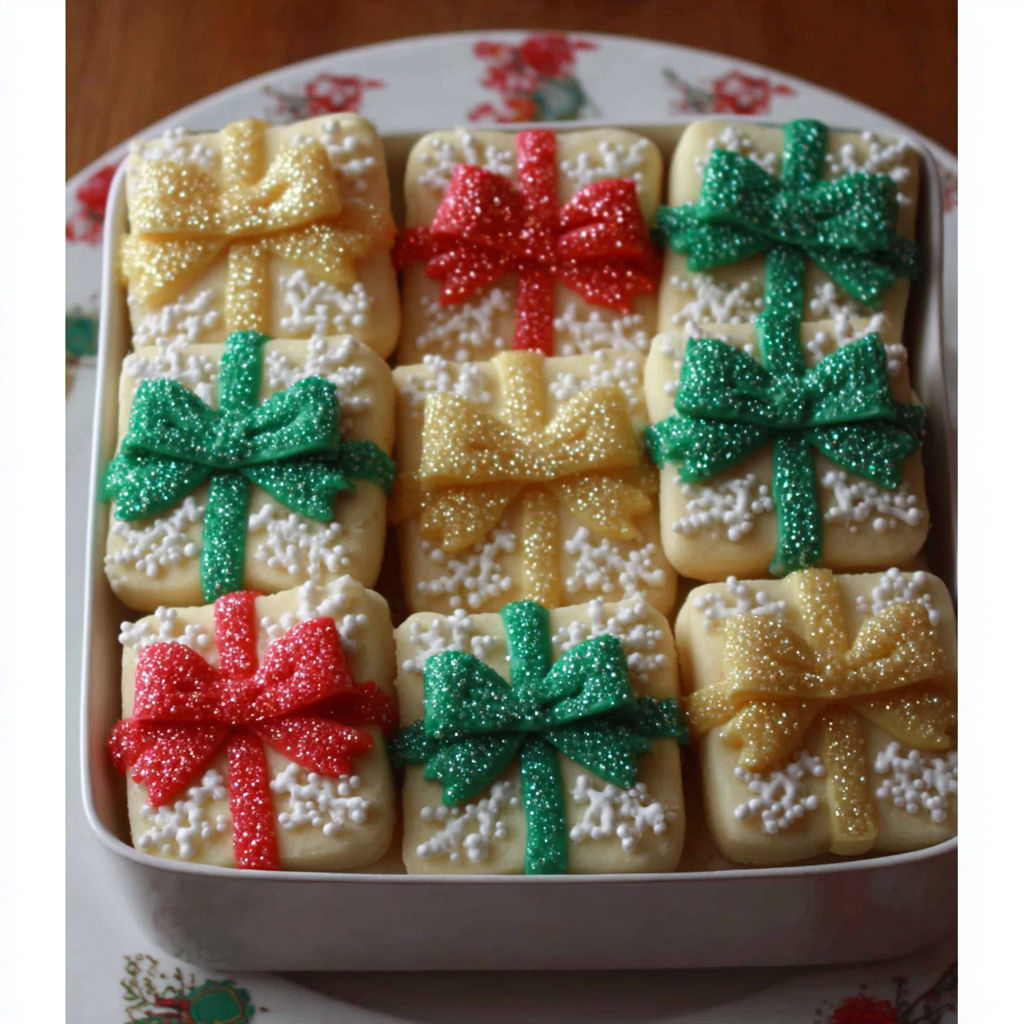
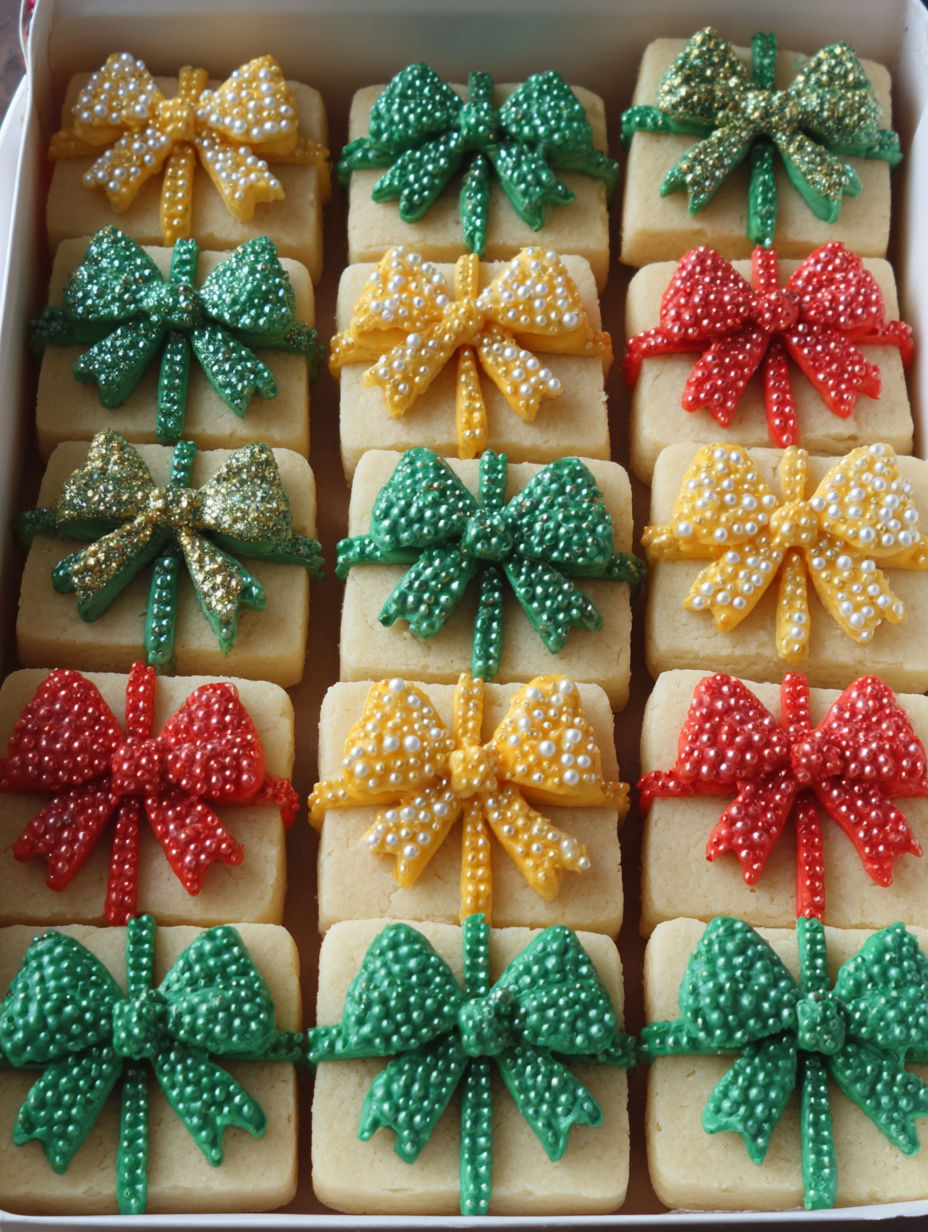
These Christmas Present Cookies turn simple sugar-cookie dough into charming little gifts perfect for the holiday season. Each cookie is carefully shaped and decorated to look like a tiny wrapped present with colourful icing ribbons and sprinkle bows. They are crisp, buttery and delightfully festive, making them wonderful for parties, gifting, or just adding some seasonal joy to your table. Even beginners can create these beautiful treats with a bit of patience and creativity.
I first tried making these during a Christmas gathering with friends in Provence and everyone loved how they blended simple flavours with that extra decorative touch. Now they are always part of our holiday baking tradition.
Ingredients
- Unsalted butter softened: ensures smooth dough and better control over sweetness. Choose high quality French butter like Président or Isigny for rich flavour
- Granulated sugar: sweetens the cookies without overpowering
- Zest of small orange or half lemon: optional but adds a subtle fresh note to brighten the dough
- Large egg at room temperature: binds ingredients and gives a tender crumb
- Vanilla extract: classic flavour enhancer, pure vanilla is best, but quality vanilla bean paste works too
- All purpose flour: opt for flour type 45 or 55 for fine texture but avoid flour that is too strong to keep cookies tender
- Baking powder: leavens slightly to avoid overly dense cookies
- Salt: highlights flavour and balances sweetness
- Royal icing or sugar cookie icing: essential for decorating, mix in gel food colourings found in French baking shops for vibrant ribbons
- Gel food colouring in festive red, green, gold, silver: choose concentrated gels for bright colours without altering icing texture
- Tiny sprinkle bows or edible pearls: for final festive touches, available at pâtisserie supply stores or online
- Optional edible glitter: adds sparkle, use sparingly for elegant shimmer
Instructions
- Make the Cookie Dough:
- Beat softened butter and sugar together over medium speed for 2 to 3 minutes until the mixture is light and fluffy. This step is crucial for that tender texture and incorporates air to create delicate cookies. Then add the egg, vanilla extract, and zest if using. Beat until the mixture is smooth and uniform. In a separate bowl, whisk the flour with baking powder and salt to ensure even distribution of rising agent and prevent clumps. Gradually add the dry ingredients to the wet mixture on low speed, stirring just until combined. Avoid overmixing to keep the dough tender.
- Chill and Roll Out:
- Form the dough into a flat disk about 2 inches thick. Wrap it tightly in plastic wrap and chill it in the fridge for at least 30 minutes or up to 2 hours. Chilling helps solidify the fats and prevents the dough from spreading too much when baked, keeping the cookie shapes crisp and defined. Lightly flour your work surface and roll the dough out to approximately three millimetres thick. Use a 6 centimetre square cutter to cut out cookies carefully. Place them spaced about 2.5 centimetres apart on parchment lined baking sheets to ensure even baking and prevent sticking.
- Bake:
- Bake in a preheated oven at 175 degrees Celsius for 10 to 12 minutes or just until the edges start to turn a gentle golden colour. Removing them at the right time keeps the centre tender while the edges crisp up. Let the cookies cool on the baking sheet for two minutes, this helps them firm up before moving. Then transfer with a spatula to wire racks to cool completely, which is important for decorating.
- Decorate to Look Like Presents:
- Divide your icing into small bowls and tint each with the gel food colourings to get your chosen festive palette. Using a piping bag with a fine tip, pipe lines horizontally and vertically across each cookie to mimic wrapped ribbons. Add delicate bows on top by piping or place tiny sprinkle bows or pearls as decorative bows. If you like some sparkle, dust with edible glitter before the icing sets. Let the icing dry fully for two to three hours at room temperature so your decorations hold their shape.
- Serve and Share:
- Arrange these delightful cookies on a festive plate or box them to give as edible gifts. They are perfect for holiday parties, cookie exchanges, or any time you want to spread Christmas cheer through baking.

My favourite part is the subtle hint of citrus zest in the dough that balances the sweetness just right. I remember making these with my children every December and the sparkle in their eyes as we decorated is a cherished memory. The simple act of piping ribbon lines became a fun challenge and a way to bond during the holiday rush.
Storage Tips
Cookies keep best at room temperature in an airtight container away from humidity. Decorated cookies should not be refrigerated as moisture can cause the icing colours to run. You can freeze baked plain cookies before decorating by storing them well wrapped, thaw completely before icing.
Ingredient Substitutions
Butter can be replaced with European style butter for a richer taste. If you lack vanilla extract, substitute with equivalent amounts of almond extract for a nutty note. Instead of orange or lemon zest, you can use finely grated cinnamon stick for warmth.
Serving Suggestions
Pair these cookies with a hot cup of spiced tea or café au lait for cozy winter afternoons. Arrange with gingerbread in a Christmas cookie platter for a dazzling festive spread. They also make lovely edible wine glass charms when tied with small coloured ribbons.
These festive cookies make charming gifts and brighten any holiday table. Enjoy baking and decorating with loved ones.
Common Recipe Questions
- → Comment obtenir des biscuits bien croustillants ?
Utilisez du beurre ramolli et évitez de trop mélanger la pâte pour conserver sa texture. Une cuisson de 10 à 12 minutes jusqu'à des bords légèrement dorés garantit le croquant parfait.
- → Quelle est l'importance de refroidir la pâte ?
Le refroidissement permet de raffermir la pâte pour un découpage net des formes et évite que les biscuits ne s’étalent à la cuisson.
- → Comment réussir les décorations colorées ?
Divisez le glaçage royal en plusieurs portions, colorez avec des colorants alimentaires en gel, puis réalisez les rubans et nœuds à l’aide de poche à douille pour un effet soigné.
- → Peut-on ajouter d'autres arômes dans la pâte ?
Oui, des zestes d’agrumes comme orange ou citron apportent une fraîcheur subtile qui relève le goût sans masquer le beurre.
- → Comment conserver ces biscuits après décoration ?
Conservez-les à température ambiante dans une boîte hermétique. Évitez le réfrigérateur pour ne pas altérer les couleurs du glaçage.